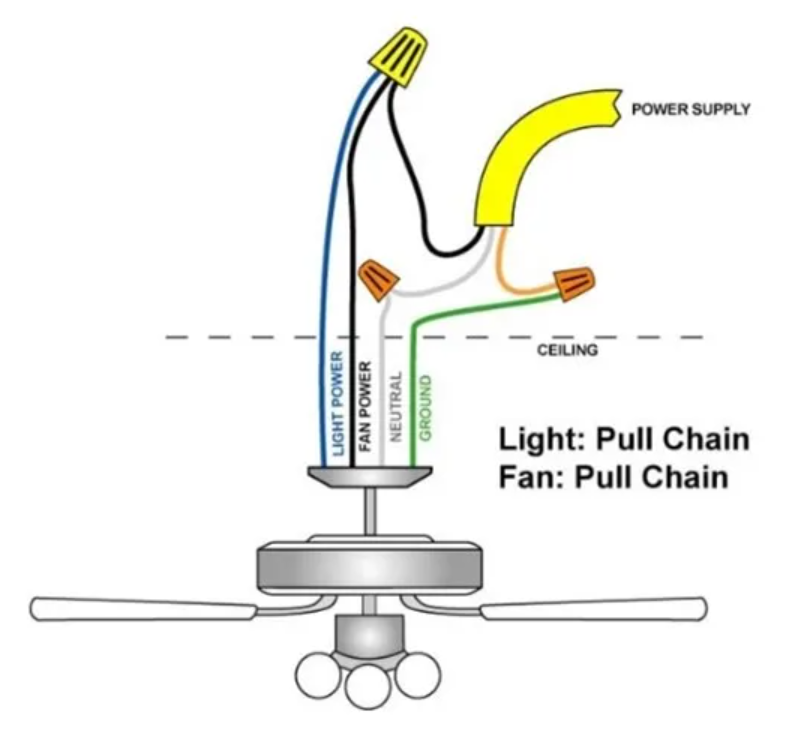
The first step in wiring the ceiling fan is to provide power to the fan and the ceiling light. You need to bring power from a nearby location to your fan. In the image, you can see that power is supplied to both the fan and the light kit. Additionally, most ceiling fans come with a separate blue wire that you need to attach to power the light kit. This allows you the convenience of powering the light in the future if needed.

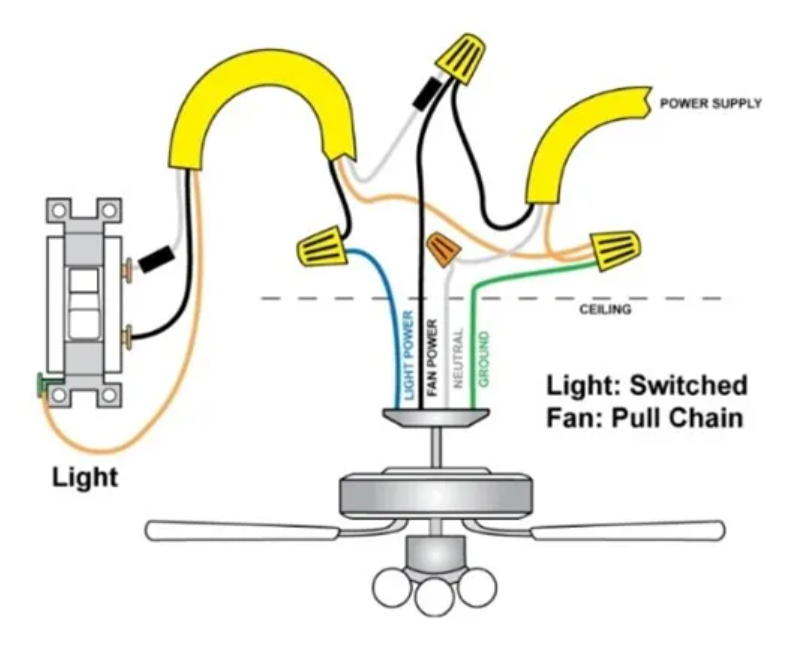
The next step is to switch on the lights and use the pull chain for the ceiling fan. In the diagram, you can observe the process of switching the hotline to the light kit by inserting the switch. Many people use 12/2 wire with the ground wire to create this type of loop. It’s important to ensure that you properly cover the black tap, indicating it as a hot wire rather than a neutral line.

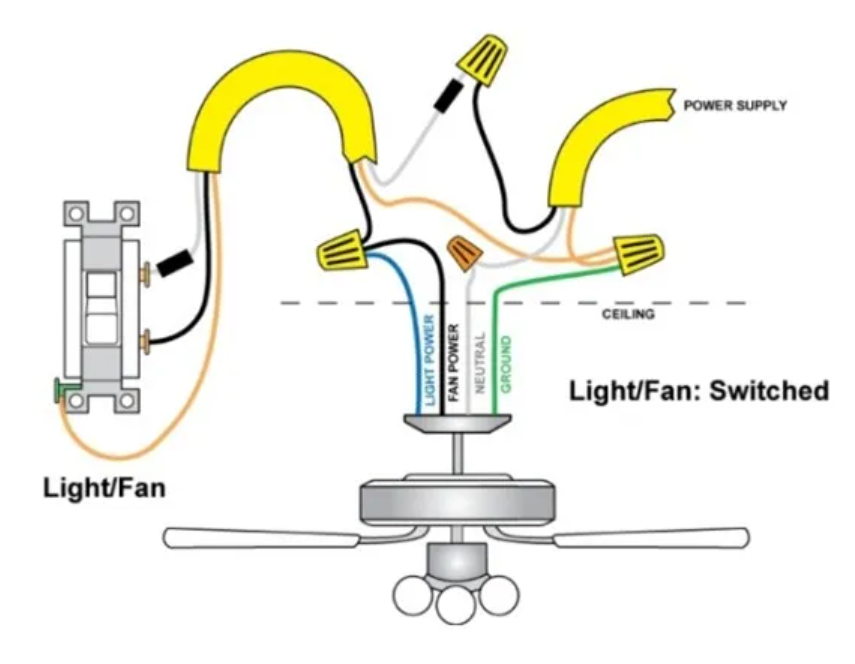
Alternatively, you can choose to power both the fan and the Kichler light kit with the same switch. As shown in the image, the power to the fan motor and light kit is coming from the same switch. The neutrals and grounds will be simply tied up together, and this setup will not cause any further issues.

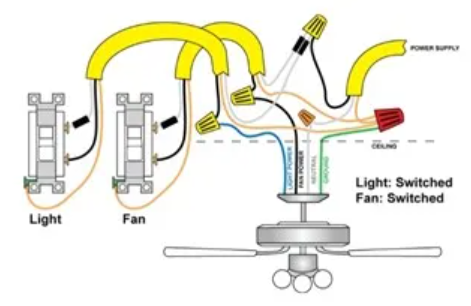
The next step is to switch the fan and light kit using different switches. Though the image may seem complex, it requires wiring single pole switches, which is a straightforward process. The key is to supply power to both switches, with the black wire for the fan and the blue wire for the light kit. Pay close attention to the diagram and ensure that you add a black tap to both ends of the wire.

Alternatively, you can choose to switch both the fan and the light with the same switch, with power at the switch. This method offers several advantages, including the avoidance of re-labeling neutral wires, as the wires remain consistent. Additionally, it facilitates easy swapping out of ceiling fans. However, we strongly recommend deactivating the breaker and checking your wires with a voltmeter to ensure safety and proper wiring.