Kichler Ceiling Fan Remote Troubleshooting
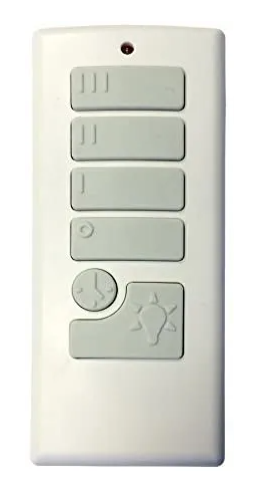
Using a Kichler ceiling fan remote control can simplify the operation of your fan, providing control over both fan speed and light settings. However, if you encounter issues with your remote control not functioning properly, there could be some underlying problems.
In this troubleshooting guide, we will address common remote control issues and offer fixes to resolve them. By following these solutions, you can restore the functionality of your Kichler fan remote and enjoy smooth operation once again.
Check the Ceiling Fan Range
As we know that the remote operates through a transmitter that sends signals to the receiver in the ceiling fan. When your ceiling fan remote is not working properly, it’s essential to check the signal range and ensure there are no obstructions that might interfere with the communication.
Firstly, verify that you are within the recommended range, which should not exceed 40 feet. Bringing the remote within 20 feet of the fan can help improve signal strength and effectiveness. Additionally, check for any obstacles or obstructions between the remote and the ceiling fan that could prevent the signal’s transmission.
Check Remote Batteries
Dead or improperly placed batteries can be a common reason for the remote control not working. It’s important to check the batteries as part of the troubleshooting process.
Firstly, verify the status of the batteries by checking the remote’s indicator light. If the indicator light is not functioning, it indicates that the batteries may be dead. In this case, replace the batteries with fresh ones to ensure proper functioning.
Additionally, double-check that the batteries are inserted correctly in the remote control. Sometimes, a simple adjustment in battery placement can resolve the issue. If you have a battery tester, you can use it to confirm the battery’s power level. Alternatively, getting new batteries is the best act to get rid of any doubts.

Ceiling Fan Frequency
If the previous fixes do not resolve the problem, the next step is to check the ceiling fan frequency. Ceiling fans typically have dip switches that determine the frequency settings. To address this issue, begin by switching off the circuit breakers that supply power to the fan. Then, detach the ceiling fan canopy to access the dip switch settings, which usually consist of four sliding buttons.
Use a screwdriver, and rearrange the sliding buttons to create a new frequency combination. Once the adjustment is complete, remount the fan as it was before.
Check Remote Control Frequency
Homeowners should also verify the frequency of the dip switch on the remote control. To do this, remove the back cover of the remote, where you will find the dip switches. Use a screwdriver to ensure that the frequency of the remote matches that of the ceiling fan. Once the adjustment is made, put the cover back on and replace the old batteries with new ones. Finally, test whether the remote is functioning properly or not.